Shapes
Shapes are pivotal in visualizing and representing data, processes, or ideas on canvas. With YouDesign, adding shapes to your canvas is straightforward, allowing you to create diagrams and models quickly for your stakeholders.
Adding Shapes
You can add shapes to the board using the following methods:
Click & Add
- Choose or search for the desired shape from the Shapes library in the Diagramming panel.
- Single left-click on the shape.
- Move your mouse on the canvas where you want the shape to be placed.
- Click again on the desired location to place the shape.

Drag & Drop
- Choose or search for the desired shape from the Shapes library in the Diagramming panel.
- Left-click and hold to drag the chosen shape to the desired location on the canvas.
- Drop (release the mouse button) to place the shape.

Moving Shapes
You can move shapes by clicking on the shape and dragging it where you want.
Moreover, you can multi-select and move several shapes at the same time with the following methods:
- Drag the selection box across the elements you want to select. Drag and drop to a desired location.
Note: Press and hold the left mouse button for at least one second to activate selection mode, then drag to make your selection. Releasing too soon may result in moving the canvas instead of making a selection.
- Hold the Ctrl (or Cmd on Mac) key while clicking on individual shapes to toggle their selection. Once you select multiple shapes, you can move the entire selection to a desired location.
Removing Shapes
To remove a shape from the canvas, select it and press "Backspace" or "Delete" button on your keyboard.
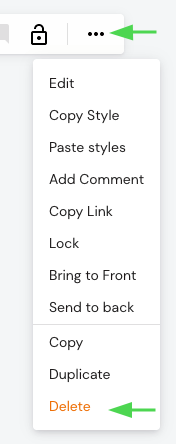
Alternatively, select a shape and navigate to "Delete" option in the toolbar dropdown menu.
Lock Controls
Locking an item is a safeguarding measure. It ensures that once an item is specifically positioned or edited, it won't be accidentally deleted, moved, or edited.
Use the following methods to control shape lock:
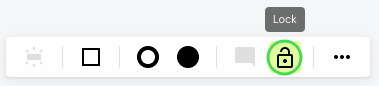
- Lock: Select an item or a group and select the Lock option in the toolbar.
- Unlock: Select an item or a group, then click and hold Unlock button until the toolbar appears.

It is possible to use lock controls for multiple selected items on the canvas.
Rotation
You can rotate shapes around their central point (clockwise or counterclockwise).
To rotate a shape, select it, and drag the "Rotation arrow" icon around the shape until you reach the desired position.
Size adjustment
You can adjust the size of all shapes and items:
- Select the shape and hover over its border.
- Once you are close to the edge of a shape, an arrow indicator will appear.
- Click and drag the indicator until the shape is adjusted to the desired size.
You can adjust size horizontally and vertically on both sides, and horizontally in every corner.

Modify Shape Type
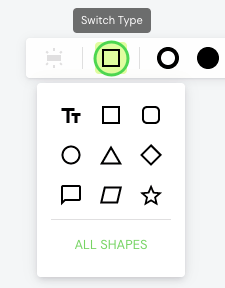
Modify existing shapes on the canvas into a text box, or change the shape type with a simple toolbar option.
To convert a shape:
- Select the shape you want to modify.
- In the toolbar menu, select the “Switch type” option.
- Select a new shape type, text box or press "All Shapes" to see the extended modification options.
Copy & Duplicate
To copy or duplicate a shape or an item, right-click on selection, and choose the "Duplicate" option (This will appear after clicking on “More” (3 dots) button on the toolbar.)and the duplicated shapes will be placed on the board.
Alternatively, you can use Copy and Paste functionality in the toolbar menu or just press Ctrl+C / Ctrl+V (Cmd+C / Cmd+V on Mac) on your keyboard.
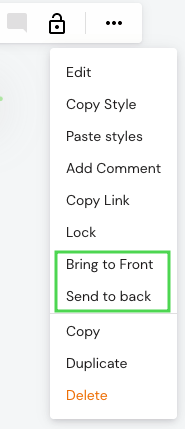
Layer Positioning
This feature allows you to adjust the stacking order of shapes on the canvas.
- Bring to Front: Select a shape and use the "Bring to Front" option in the toolbar to move it on top, above all other shapes.
- Send to Back: Choose "Send to Back" to place the selected shape behind all others.
Updated 5 months ago